Biochar* is charcoal created by pyrolysis of biomass, and differs from charcoal only in the sense that its primary use is not for fuel, but for biosequestration or atmospheric carbon capture and storage. Charcoal is a stable solid, rich in content, and thus, can be used to lock carbon in the soil. Biochar is of increasing interest because of concerns about climate change caused by emissions of carbon dioxide (CO2) and other greenhouse gases (GHG). Carbon dioxide capture also ties up large amounts of oxygen and requires energy for injection (as via carbon capture and storage), whereas the biochar process breaks into the carbon dioxide cycle, thus releasing oxygen as did coal formation hundreds of millions of years ago. Biochar is a way for carbon to be drawn from the atmosphere and is a solution to reducing the global impact of farming (and in reducing the impact from all agricultural waste). Since biochar can sequester carbon in the soil for hundreds to thousands of years, it has received considerable interest as a potential tool to slow global warming. The burning and natural decomposition of trees and agricultural matter contributes a large amount of CO2 released to the atmosphere. Biochar can store this carbon in the ground, potentially making a significant reduction in atmospheric GHG levels; at the same time its presence in the earth can improve water quality, increase soil fertility, raise agricultural productivity and reduce pressure on old-growth forests.
*As per Terms and Conditions of Wikipedia Encyclopedia we attribute credit to the authors on Biochar by listing their URL and hyperlink here: http://en.wikipedia.org/wiki/Biochar
Preparation of biochar
After browsing through many resources on techniques to prepare your biochar before mixing it with the soil we found Peter Hirst (New England Biochar) gave the best instructions: “The biochar has a micro-porous structure and it also chemically attracts organic molecules and water and tends to hold them in place. To make them available for the plants it has to be soaked or saturated with all of those elements before it goes in the ground otherwise it will be competing with the plants for the water, the microbes and the nutrients and it can actually harm the plants if it goes in raw. So we advocate mixing the biochar with soil or a good active organic compost before it goes in the soil so it soaks up its full compliment of water and nutrients and microbes so that it can make those available immediately to the plants as soon as it is added to the soil. Ultimate concentrations after some time of repeated applications of biochar will work up to about 8 to 10% biochar by weight of the soil content.” Since this system produces approximately 265 lb (120 kg) of biochar, you would eventually be able to enrich an area of approximately 250 ft2 (23 m2) or 2860 lb (1300 kg) of topsoil.

For expert hands-on advice buy The Biochar Revolution. Chapter 8 is especially relevant and gives the best advice for characterizing Biochars: attributes, indicators, and at-home tests written by Hugh McLauglin, PhD PE, Director of Biocarbon Research, Alterna Biocarbon Inc.
To see more benefits of biochar as a soil amendment see this post: http://vuthisa.com/2011/01/09/biochar-as-a-soil-amendment-and-carbon-sequestering-tool
Create a Biological Soil Reef
RA$ headed up by Gary Farr have done planting trials in South Africa using their blended biochar product with incredible success. BKI recorded a talk to local farmers and combined it with his presentation supplied to me by him. Activate Closed Captions (CC) to also read his speech on-screen as the audio isn’t great.
Contact Gary Farr to develop a biochar blended product for you or buy one of their existing products:
+27 seven 3 037 8700
Regenerative Agriculture Specialization (RAS)
Re-Igniting Biological Synergy and Diversity
The process – explained
Now that we know how to make biochar, what thermodynamic reactions are actually taking place during the different stages of charcoal/biochar making? Knowing this might help you to gauge your own operation and fine tune it. It is a good idea to invest in an industrial purpose, digital thermometer and Type K thermocouple rod ±0.5 metres (1.6 ft) long. This will cost approximately $200 (USD).
The pyrolysis of wood in such apparatus basically resolves itself into 4 different stages:
- Evaporation of the moisture present in the wood takes place as the initial phase, up to an average temperature of 170 °C (338°F). During this period scarcely any gas is produced.
- As the fire builds up inside the kiln, the temperature rises and at approximately 280 °C (536°F) the exothermic reaction begins to take place. Gas consisting almost entirely of carbon monoxide and dioxide is evolved and a certain amount of acetic acid is formed together with small quantities of wood-naphtha and tar.
- The exothermic reaction then continues during which concentration of carbon in the biochar takes place. Large quantities of hydro-carbons, acetic acid and wood-naphtha and tar are produced while the temperatures rise to 380 to 400 °C (716 to 752°F).
kiln development
We have ceded Intellectual Property to an international investment company concerning some of our latest designs. Please visit our NEWS page for updates: https://vuthisa.com/news/
From this point of the page onwards we outline the progression of our kilns starting in 2015.
Create Biochar with the Trans-Portable Kiln Method.

2015

2015
We have made it our mission to improve the Portable Metal Kiln charcoal-producing-kiln and investigate ways to turn it into a biochar producing kiln. Conventional TPI kilns uses a ‘direct combustion’ method, whereby the heat for carbonisation comes from burning a portion of the biomass feedstock in a limited air environment. Vuthisa however decided to promote the plans for this basic system of producing charcoal and biochar so that others can build it and improve upon it. By constructing a standard kiln everybody is immediately on the same page. Join our exclusive community of Portable Kiln owners, known as the Portable Kiln Google Group for sharing ideas, innovations and improvements.

To produce biochar many enthusiasts opt for the 55/30 system, which consists of a 55-gallon outer drum containing the fire around a 30-gallon inner drum acting as the enclosed retort. For examples of such systems visit: http://www.carbon-negative.us/Burners.htm and http://youtu.be/COPqvVH7jiw.


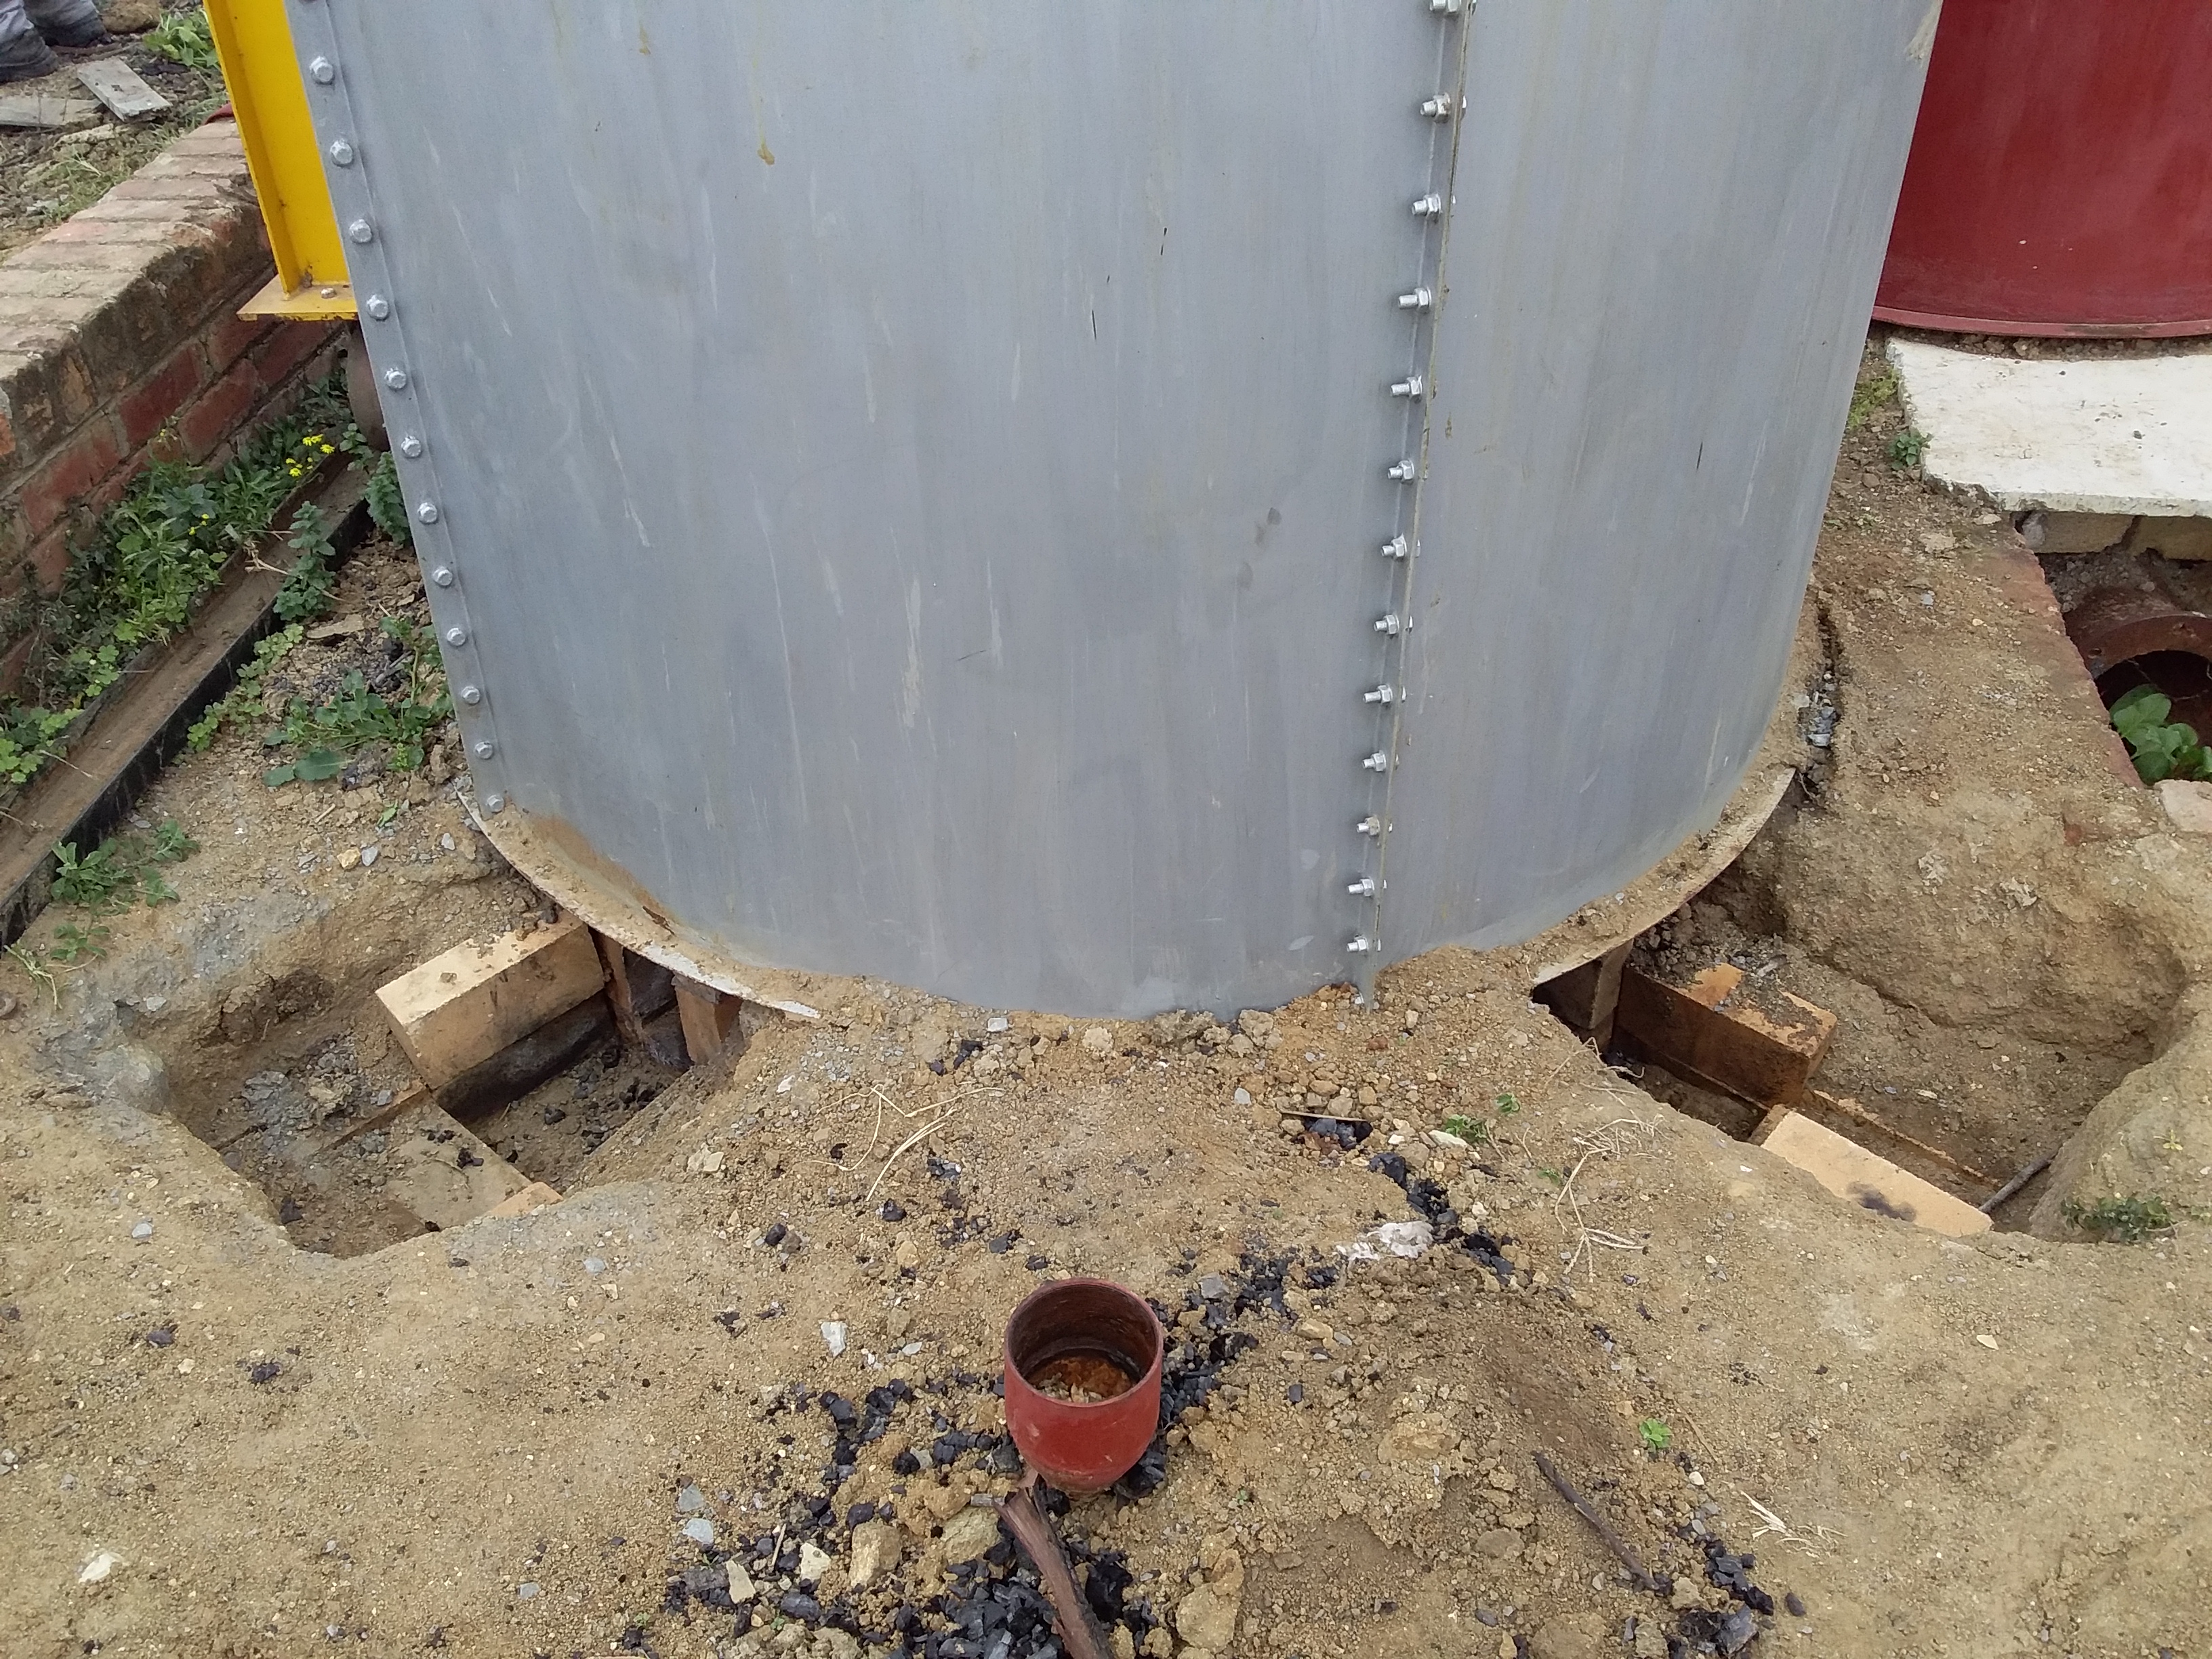
To produce biochar, the Trans-Portable Biochar Kiln can be constructed from either one and a half (Smaller unit) or two (Larger unit) standard (2.350 x 1.225 metres) mild steel sheets. In the case of the larger unit, each sheet is cut in half to produce 2 sheets measuring 1.175 metre (L) x 1.225 metre (H). Sixteen holes are laser cut in both ends, then ‘cold rolled’ to a preset radius. The ends (35 mm) are then bent outward (± 90°) with a bending machine at the required angle to make the ‘flanges’. When all 4 sheets are brought together the kiln diameter should be 1.406 metres.
2016
Recent trials have confirmed that it is possible to clean up emissions of the Transportable Kiln and convert it to a retort system. Our conventional Transportable Kiln can accommodate 2 x 55 gallon drums for making biochar with indirect heating, but we have concluded a pilot study with funds from the Energy and Environment Partnership – Southern and East Africa (EEP-S&EA) after collaborating with biochar experts and the 3-drum (barrel) retort was conceptualized.
2018
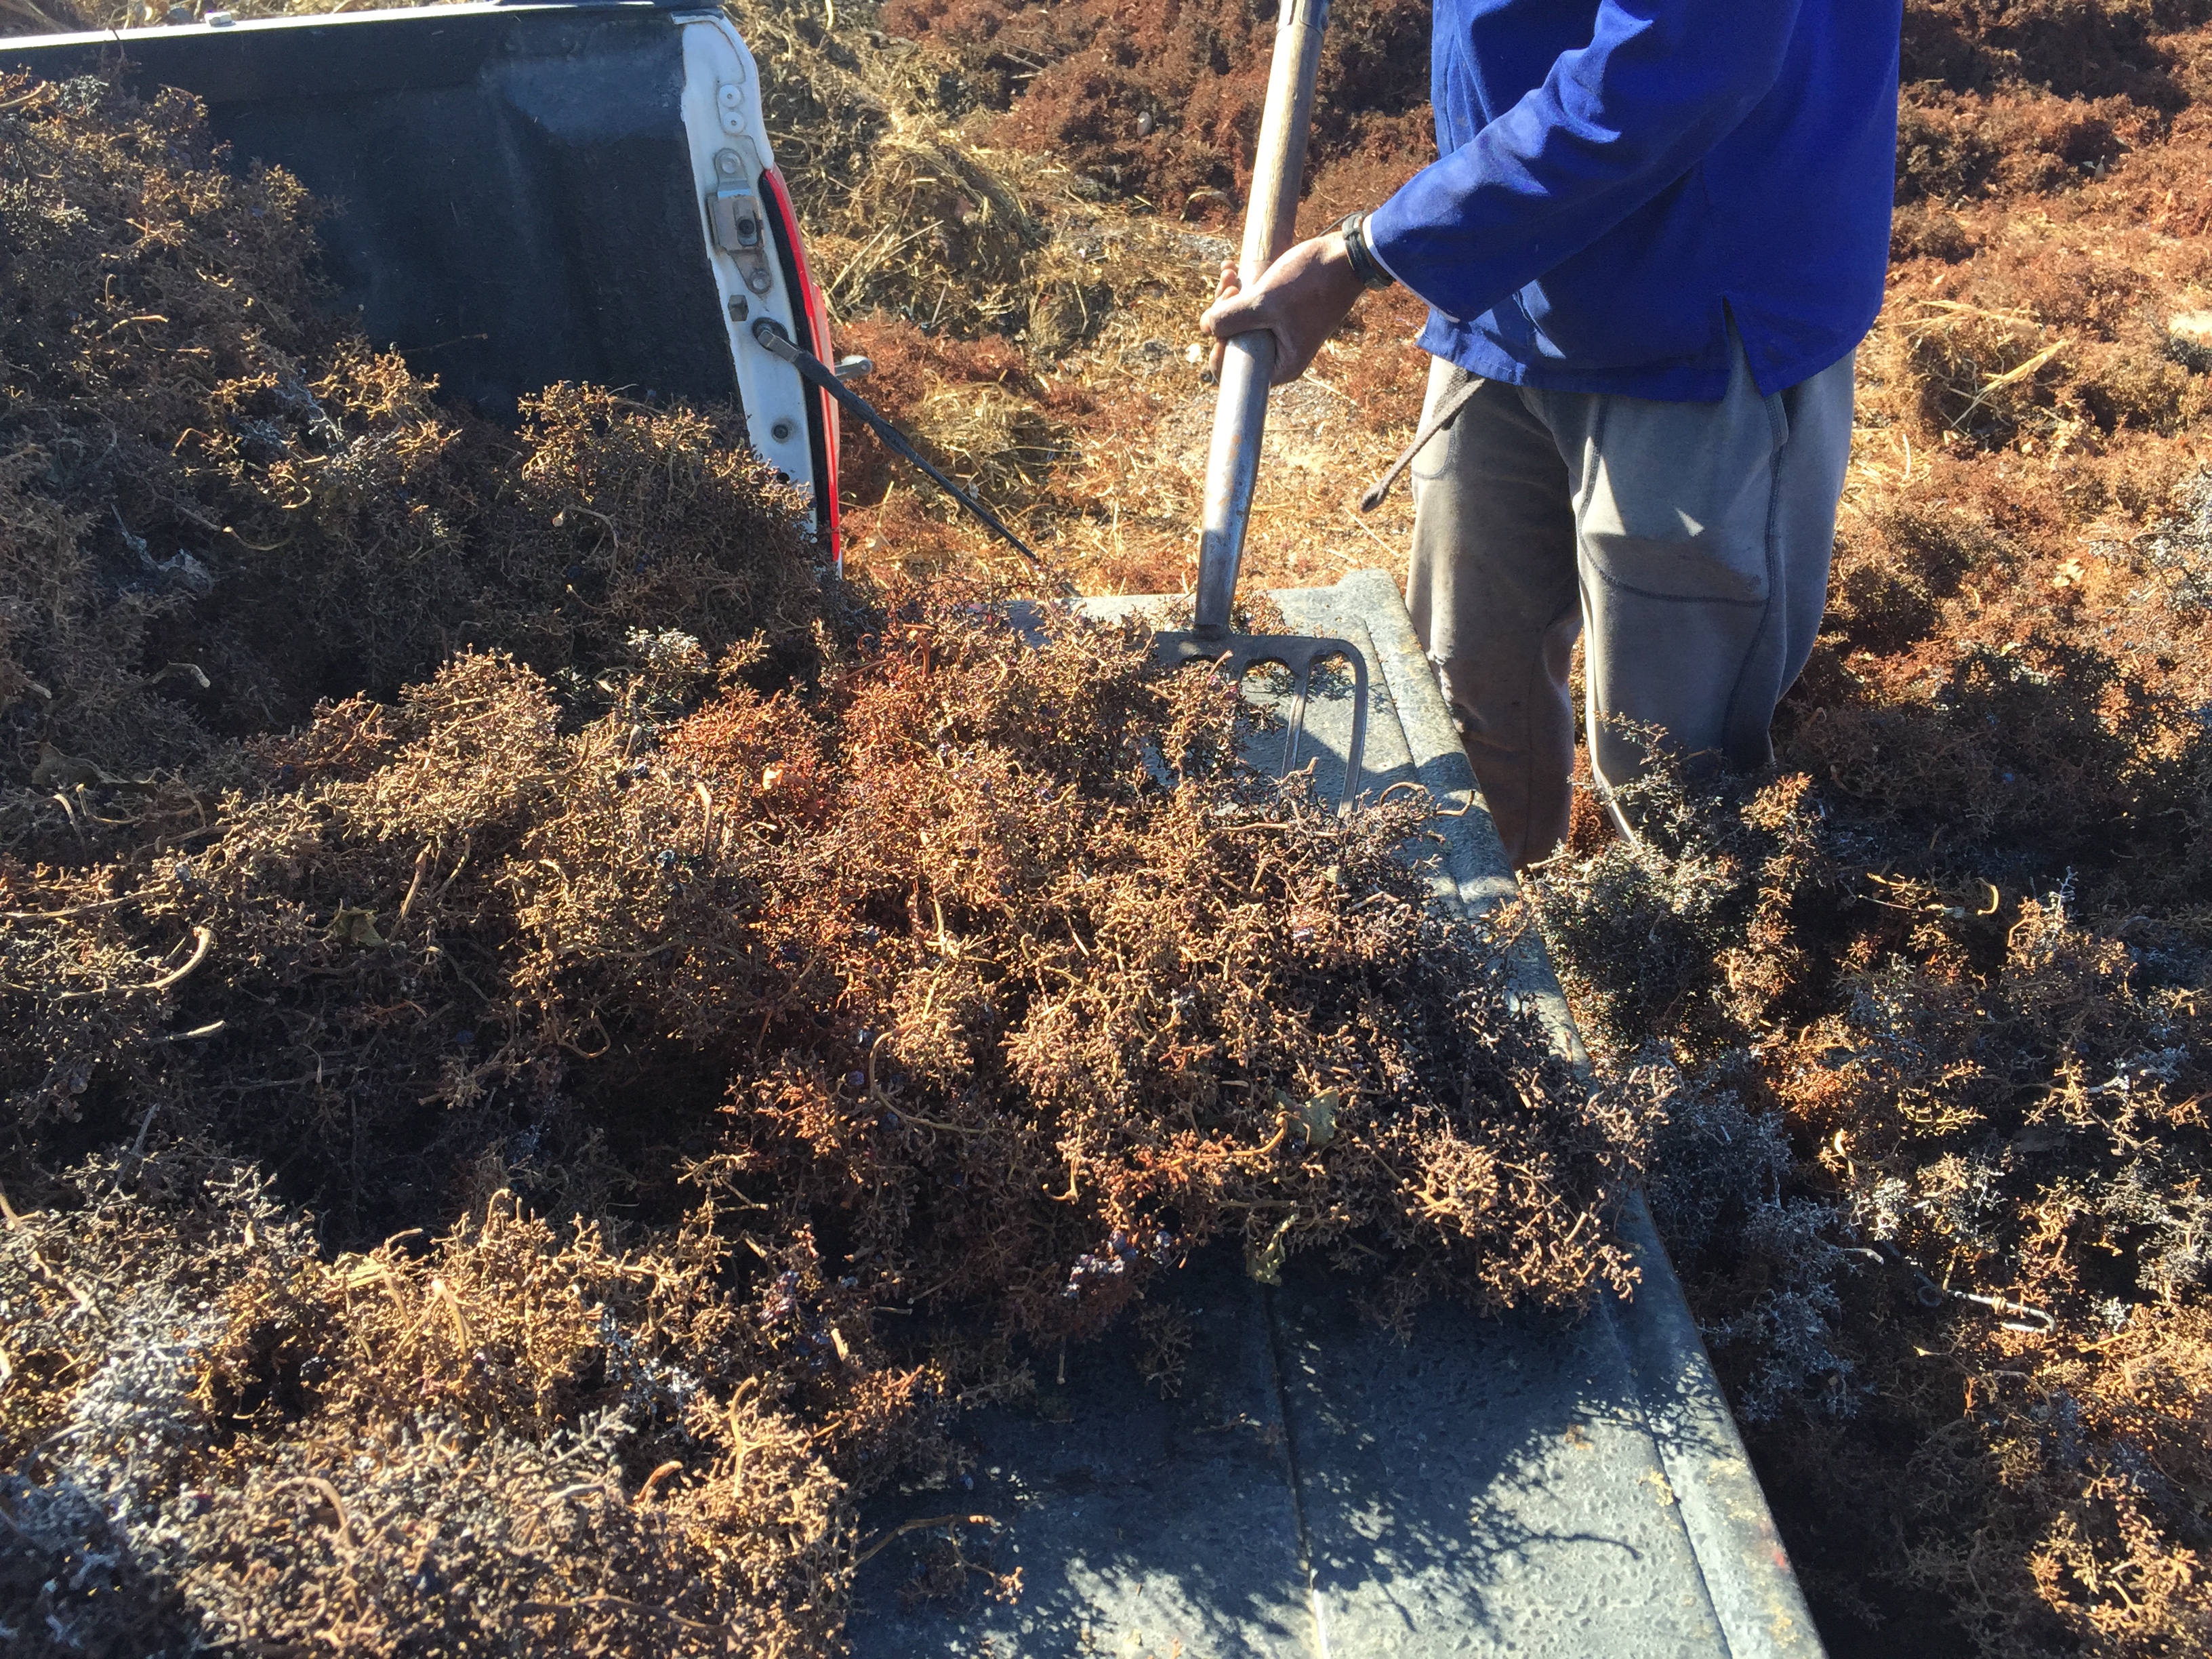
Our clients includes a Wine Estate and an Organic Farmer in Stellenbosch as well as an NGO converting IAPs (Invasive Alien Plant Species) and sawmill waste into biochar and composting mixes.


Click on the GIF image below to play the animation:

Additional information:
Airshed (http://www.airshed.co.za) calculated the emission reduction potential of our Biochar kiln as part of our Environmental Impact Assessment. Emission rates and factors for the BKI kilns was estimated by comparing emission factors for charcoal kilns as reported by Pennise et al (2001) primarily, and the United States Environmental Protection Agency (US EPA) AP42 (1995). BKI uses after-burning to reduce emissions. The US EPA states that afterburning is estimated to reduce PM, CO and VOC emissions by at least 80%. PM, CO, CH4, VOC and PAH emissions reported in the table below includes an 80% reduction. What we have created is in effect a cheap to operate, portable, Emission Reduction (ER) and Energy Efficient (EE) charcoal kiln.
| Average Annual Release Rate per Biochar Kiln | |||
| Pollutant Name | mg/Nm³ | mg/Am³ | tons/annum |
| CH4 | 277 | 94 | 0.64500 |
| CO2 | 11 189 | 3 810 | 26.10000 |
| N2O | 0.931 | 0.317 | 0.00217 |
| CO | 1 385 | 471 | 3.23000 |
| NO | 3.48 | 1.18 | 0.00810 |
| NOx | 3.91 | 1.33 | 0.00912 |
| PM | 189 | 64.3 | 0.44000 |
| PAH | 0.0202 | 0.00689 | 0.00005 |
| VOC | 575 | 196 | 1.34000 |
| 12 hours per batch, 18 batches per month. |
2018-2019
We have added a skirting to the top collar to allow a 100% seal of the lid if used conventionally. We do propose adhering the top and bottom collars via a continuous-seam weld if used in this configuration. If the purpose of the operation is to clear invasive aliens then the open burn will be able to process more feedstock at a time. If the focus is on creating a clean burn and producing biochar to be used as a soil amendment, then the enclosed drum system may be the way to go even though the yield will be less. We now include heavy duty lids (x3) and clamps(x3) in our DIY kiln kit for ensuring a 100% air-tight seal on the 55 Gal drums. Further trials are being done whereby open top drums are fitted with conventional lids and clamps but then inverted, with holes inserted in the lids to allow gases to exit. The clamps are then only used post charring, to extract the drums. Compared to the 55/30 system the yield is substantially increased, i.e. 45 to 60 kg of Biochar per 24 hour cycle. The Trans-Portable Kiln is easy to transport to the work site for assembly, and being circular in shape, can be rolled over fairly long distances with minimal effort and labor. It is a fairly low cost system and initial capital outlay is minimal compared to other commercial type kilns. We have been able to increase the longevity of the kilns, by increasing the gauge thickness to 3.5 mm and spot-welding on collars top and bottom. We also have strict guidelines for setting-up procedures, feedstock re-fueling, and general handling of the kilns. Download and read this research report: Assessment of the potential to produce biochar and its application to South African soils as a mitigation measure. It validates in many ways the use of a small, affordable and portable biochar retort to convert Invasive Alien Plant Species (IAPs) into biochar.
The biochar produced in our kiln have also been tested by Protechnik in South Africa in 2016. The report which can be downloaded below includes two examples of biochar made via our process: VTK1 and VTP1. Sample CCC1 is Calgon Carbsorb 40 from Messrs Chemviron Carbon. This is a coal-based activated carbon which is used as a standard for comparison of the surface areas. The comparative surface areas are as follows: VTK1 – 71% and VTP1 – 63%, derived from the BET/CO2 values. Active surface area measured by the BET/CO2 procedure is an indicator of biochar’s adsorption capacity. It is appropriate to ignore the BET/N2 values; these were included in the testwork only for verification purposes to check the integrity of the results. Reference: “CO2 at 0°C is a better probe than N2 at minus 196 C for such microporous materials as biochars”. (McLaughlin et al: Analytical Options for Biochar Adsorption and Surface Area, downloadable from http://bit.ly/28TZ1y9).
The report reveals very low Micropore and Mesopore counts – which is a further indication of adsorption capacity. Our lower HTT (highest treatment temperature) of around 500°C (this still have to be ascertained) produces some tarry volatiles which do clog up pore space. These volatiles however are the “labile” fraction. This means that, in the environment, the materials are easily broken down or displaced during the first period of residence in the soil, as the tars are dissolved, vaporise or are consumed by microbes. Thereafter, the pore volume is available for adsorption of the bigger beneficial moieties & species such as humic and fulvic acids and microorganisms. The important part is to remember that our samples reveal a large surface area and that is always indicative of good quality biochar.
The 3-drum Biochar Retort User Manual can be purchased here: http://vuthisa.com/biochar/kilns/ or go straight to payment gateway: ![]()
Training Centre Video:
2019-2021
BKI was involved in product development for Amanz’Abantu with funding from The Bill and Melinda Gates Foundation and the Water Research Council.
Rocket stoves now provide endothermic heat into drum retorts. We have the RING17 and RING20 models still for sale.
BKI kilns are now lined with refractory ceramics and comes equipped with a JIB CRANE to load and unload retort drums and lift off the insulated lid.

2022
BKI can arrange the manufacture and delivery of Mobile Pyrolysis Units in South Africa, or shipped overseas.
MOBILE PYROYSIS UNIT – BIOLYSER (Manufactured in the Western Cape, South Africa)
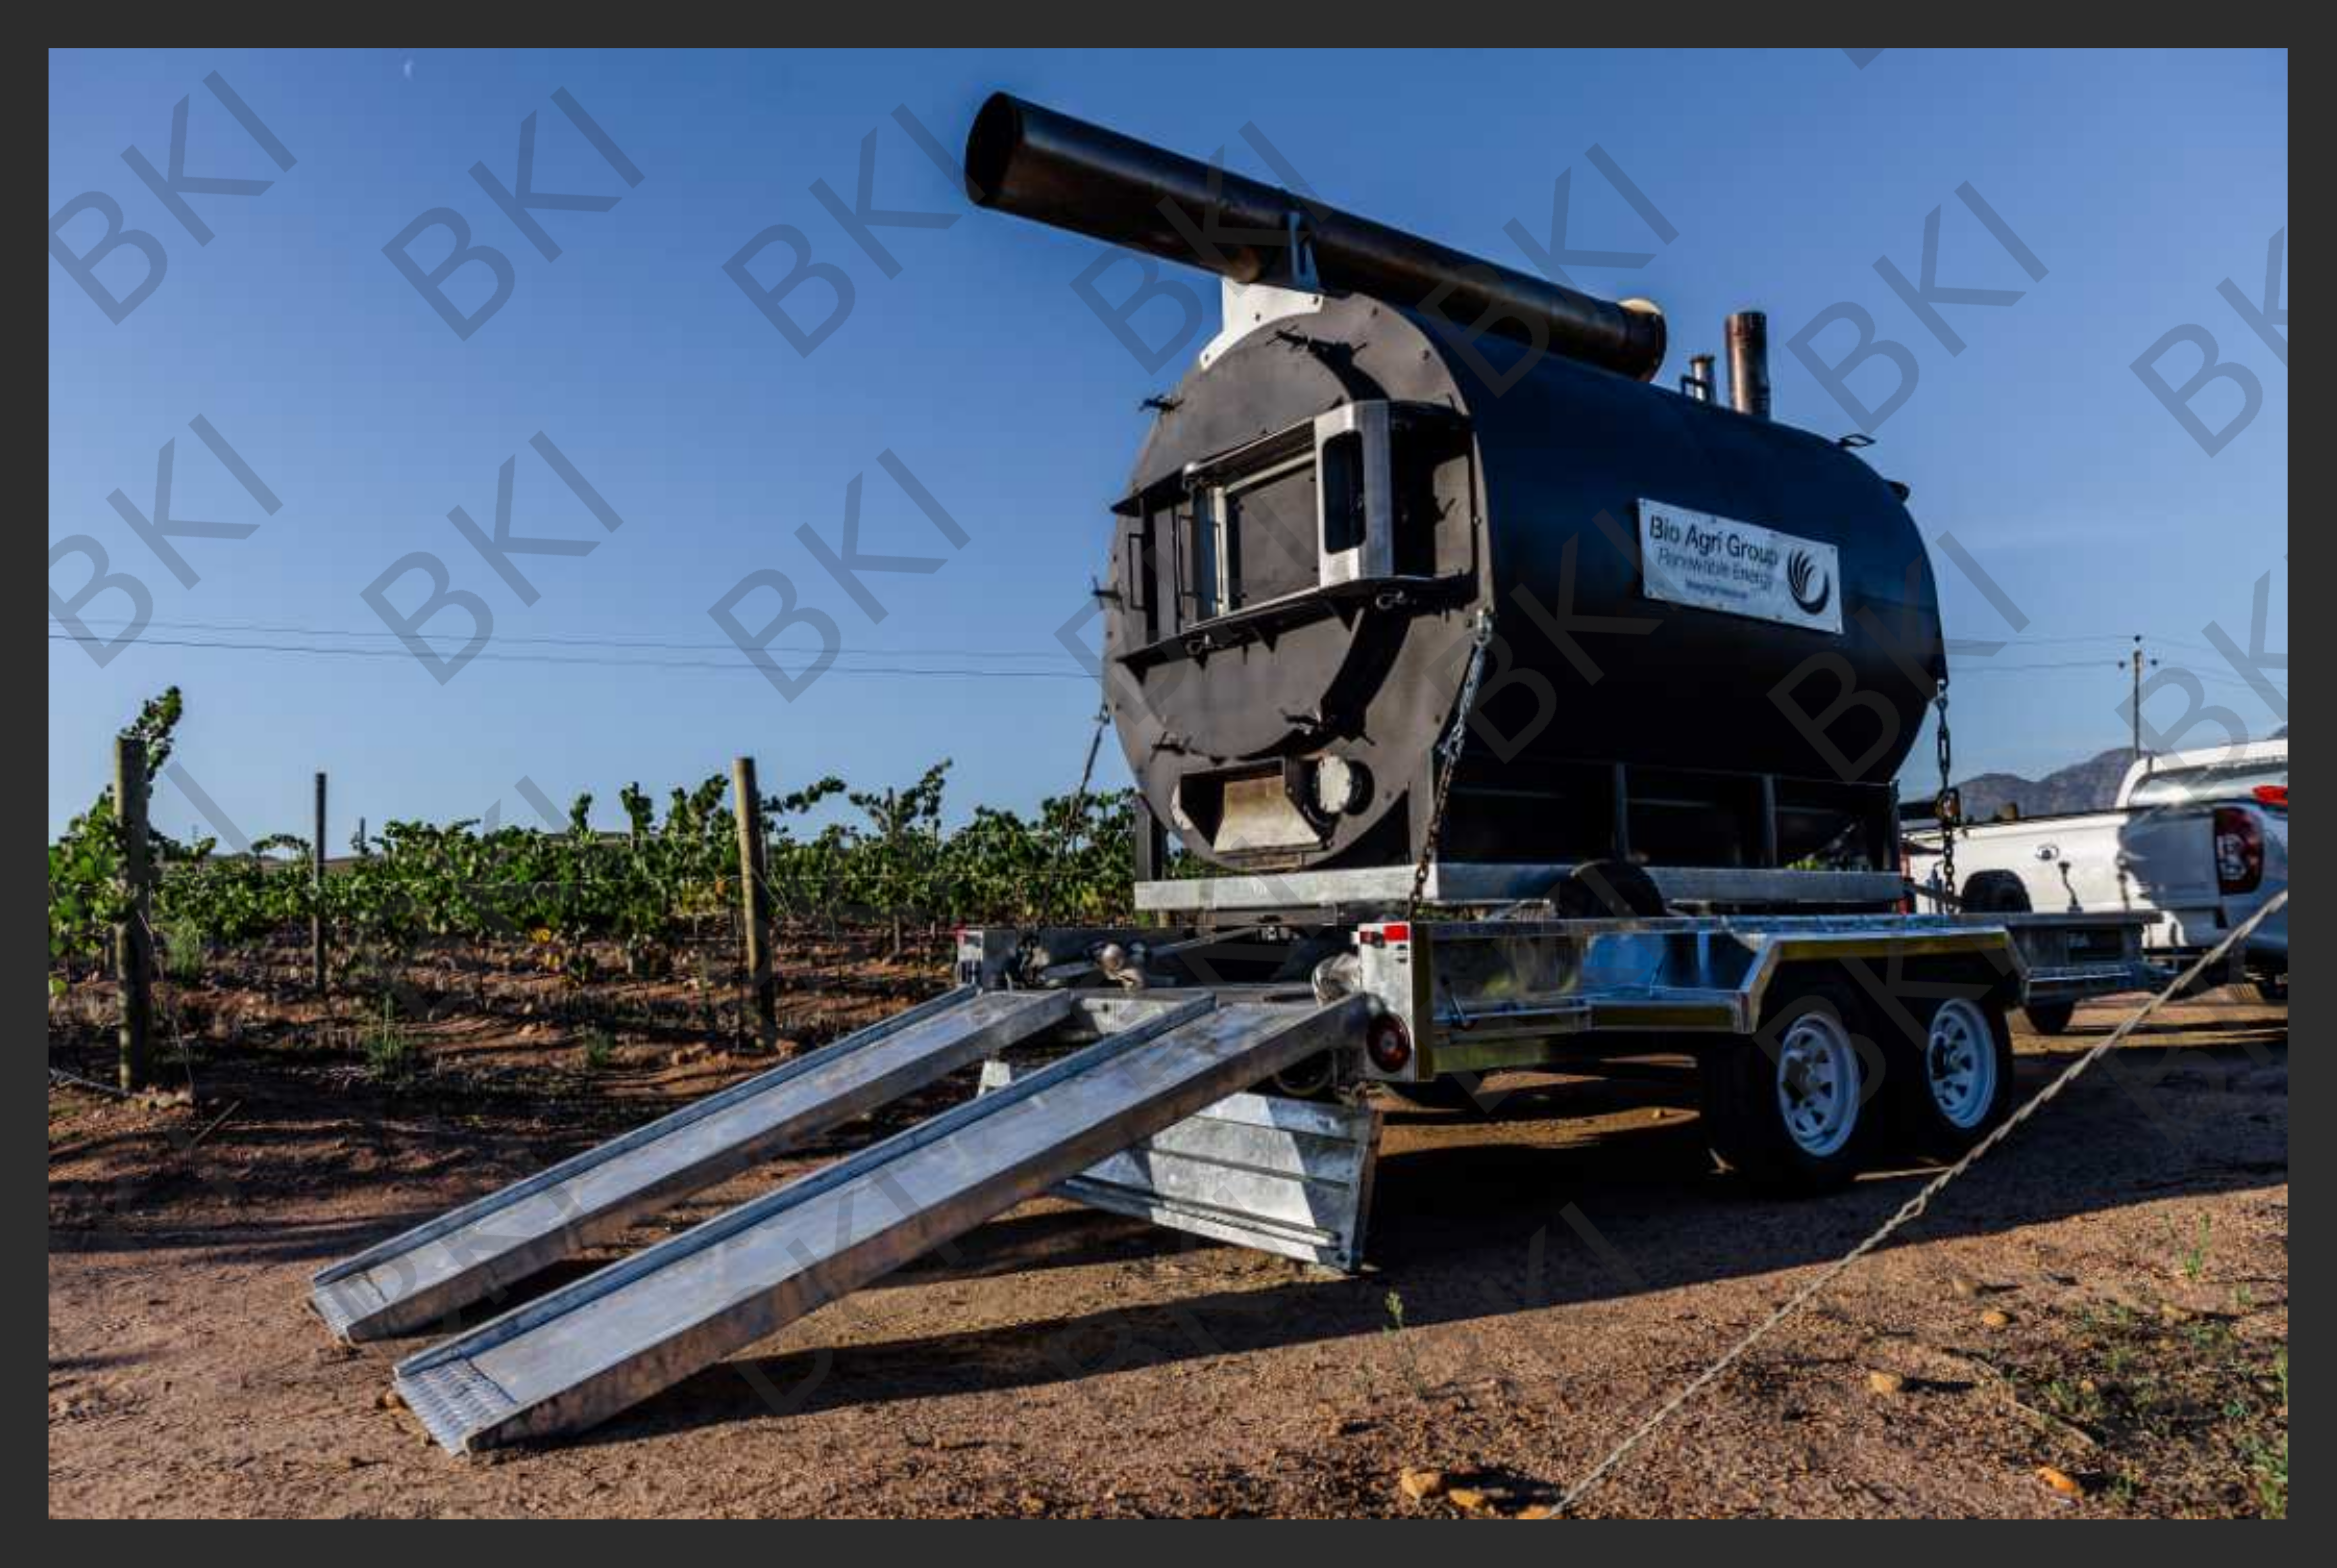
This unit is completely mobile.
Many clients have asked for a more high-tech option/solution that can produce wood vinegar and this model checked all the boxes.

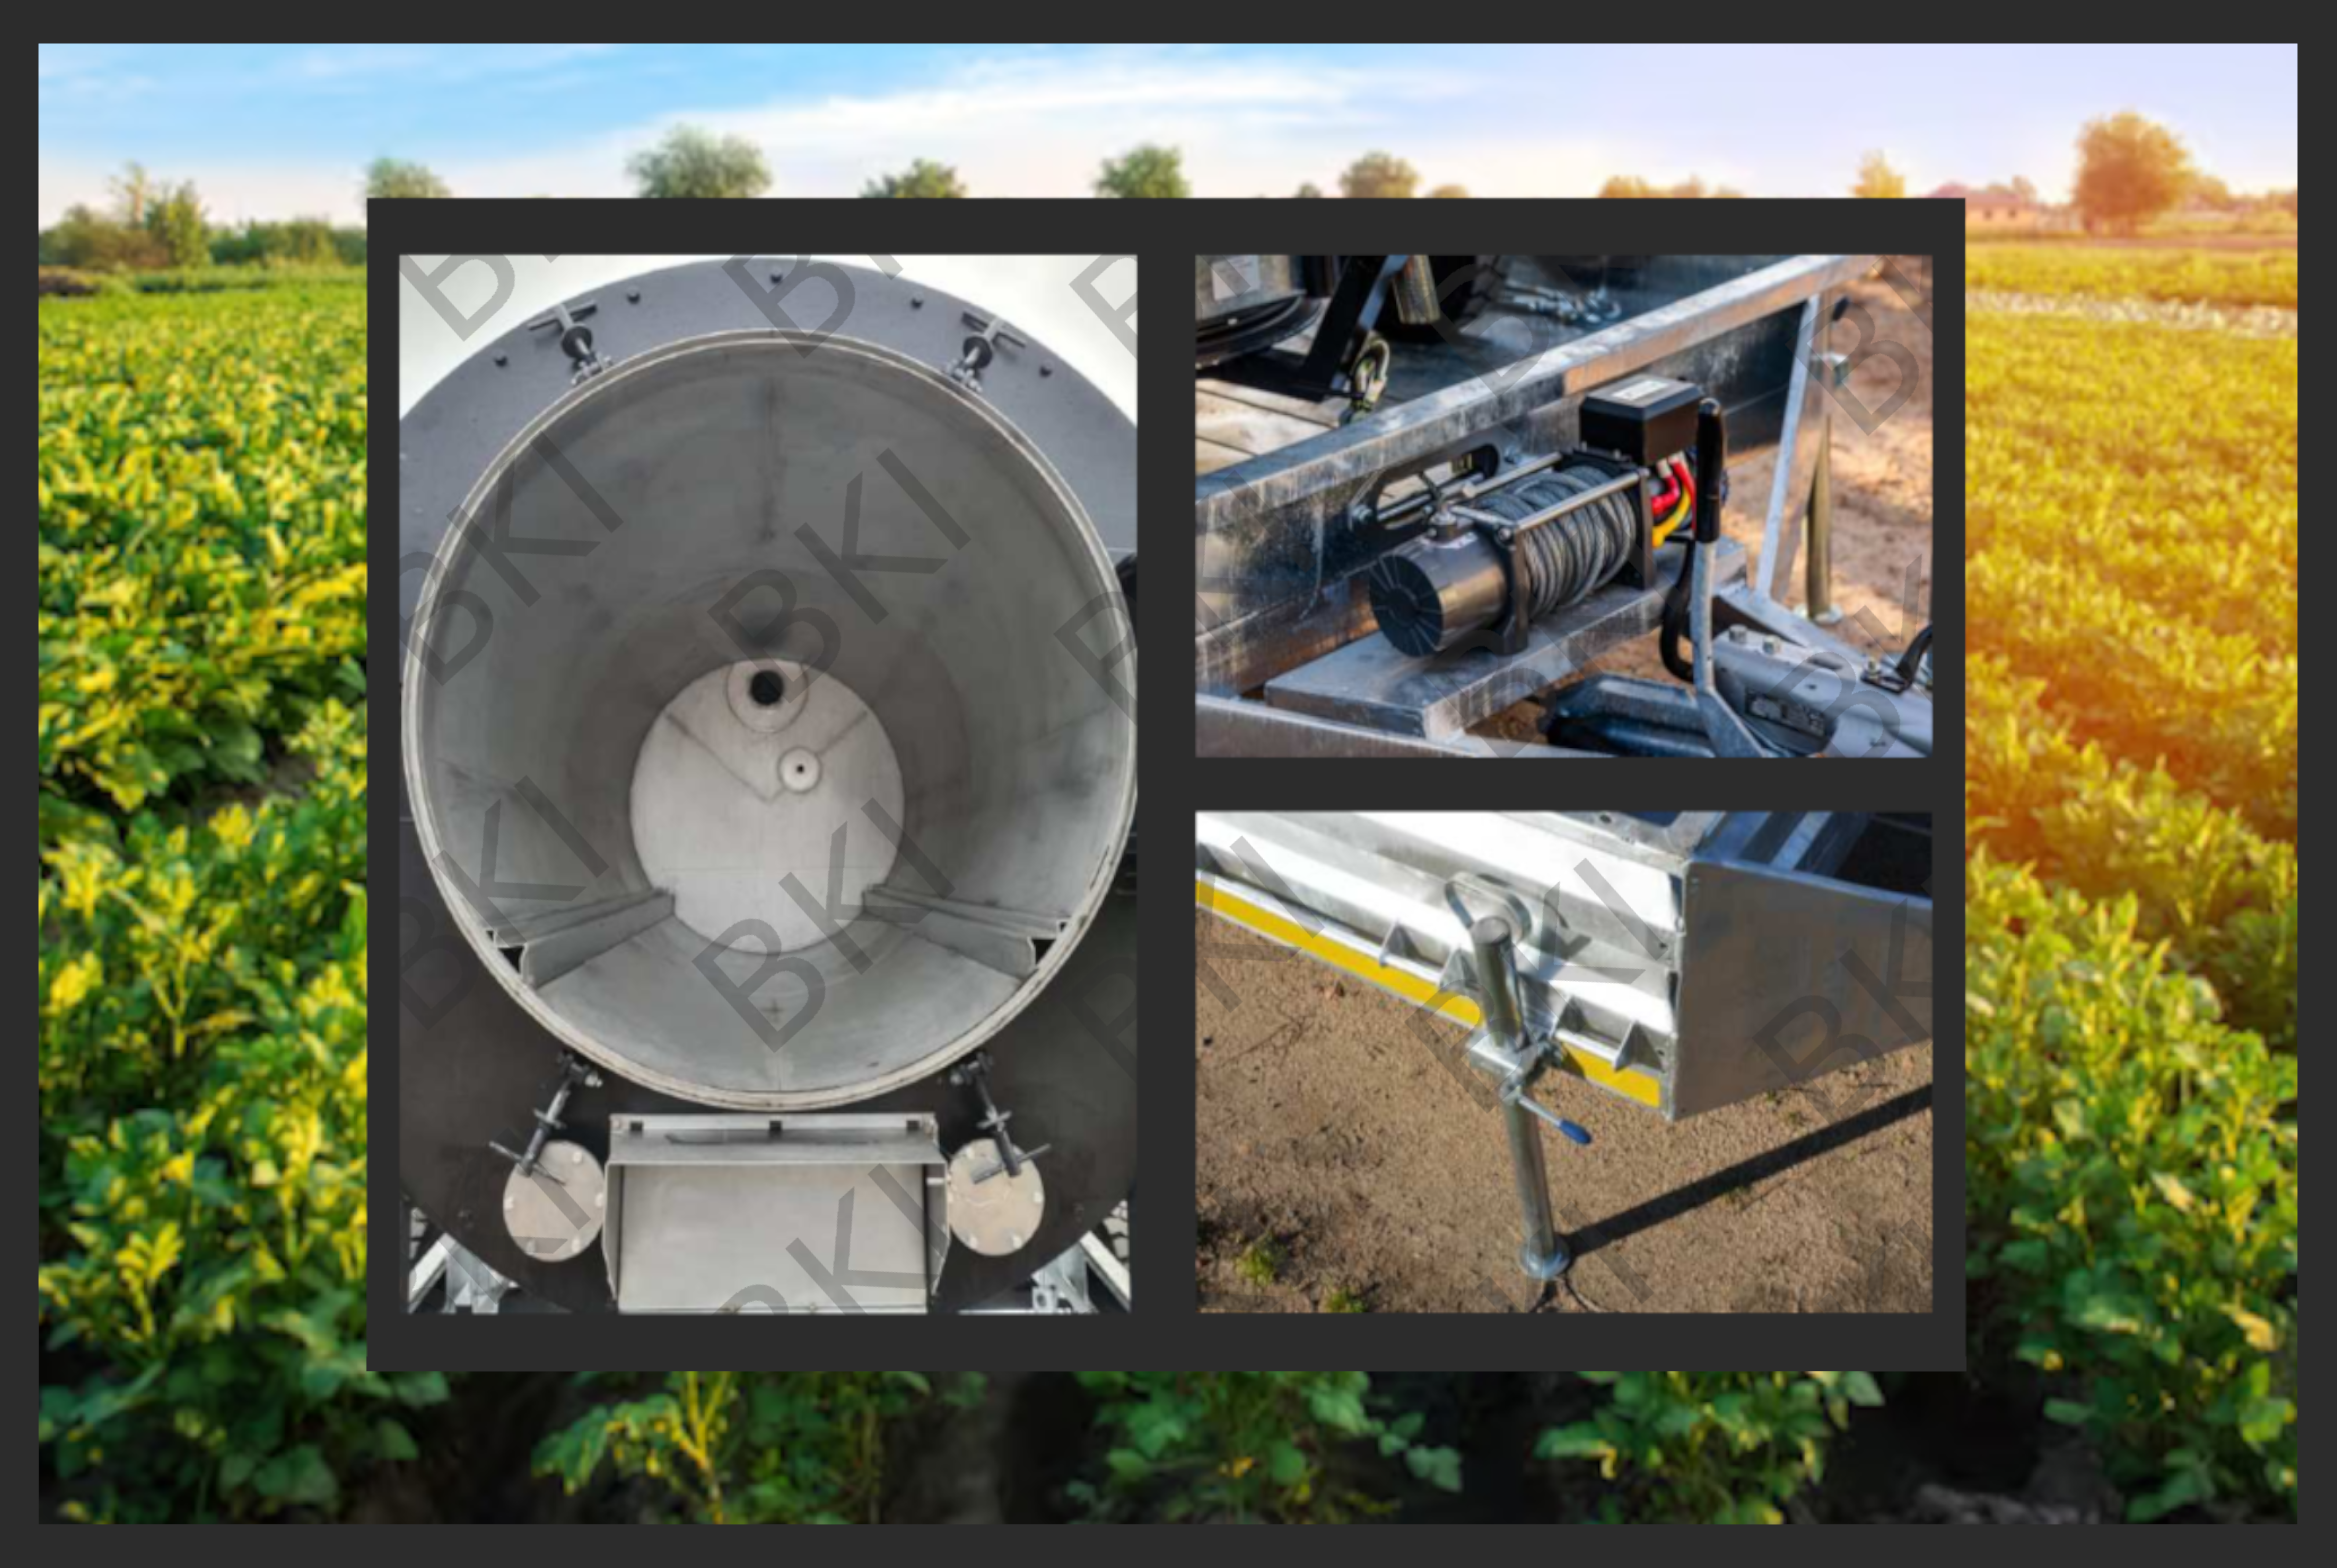
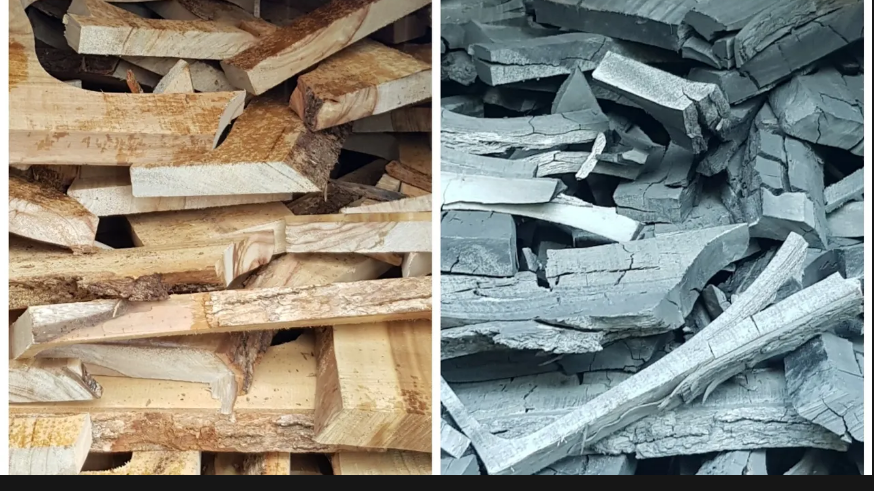
Capacity/Yield: The unit holds 600 to 700 kg of biomass and converts it into valuable products such as biochar, bio-oil and wood vinegar. No need for quenching, so it’s very light and easy to work with. Expressed differently, the unit produces between 100 and 150 kg biochar per run/day depending on type of feedstock, moisture content and particle size.
Wood Pellet Conversion: Special MESH CAGES have been developed to accommodate “difficult” feedstock types such as wood pellets, shavings, sludge, bagasse, agri-waste such as Macadamia nut shells etc.
Wood Vinegar: Recent trials have produced 6 Litres of wood vinegar per burn cycle, depending on feedstock type and moisture content. The wetter the feedstock, the more wood vinegar is lost trough the stack.
Note: The weight of biomass can vary from softwood, hardwood logs to bamboo, and moisture content also varies. Depending on size of limbs and air gaps between branches it is better to talk in terms of volume only, and biochar can weigh more on a humid day. Often times clients prefer biochar to be mixed with water in order to inoculate it and protect the microorganisms so weight will vary. Due to the presence of water, and evaporation that occurs naturally and for the sake of consistency, biochar should never be sold on a weight basis.
Co-firing: Not available at present
OPTIONAL EXTRAS
Trailer:
Double Axle Galvanized Trailer with Spare Wheel and 2 x Loading Ramps
Length: 4.1 metres
Width (internal): 1.8 metres
Leaf Springs 2000kg/set
Finish: Hot Dipped Galvanised
GVM: 3500kg
Chassis Material: 100 x 50 x 3mm Rectangular Tubing
Axle 1 800 kg each braked
Load bed Length 4000mm (inside)
Load bed Width 1800mm (inside)
Tyres: 225.15”
Fixed sides and front: 200mm
Railings: None
4 x fixed footings
60mm Double Jockey Wheel
Leaf Springs 2 Ton per set, 3 per axle
Dealers registration included in South Africa
Coupler 3500kg braked
12 Volt, 5400kg capacity electric winch
License: The design is under international copyright
Support: The unit comes with an Operating Manual, Assembly instructions, Maintenance tips and a Run procedure.
Delivery time: 6 weeks
Cost: If anyone would like a quotation (local or international) please get in touch.

Any of your product in Eswatini, very interested!!
Pop us an email admin at vuthisa dot com.
Fill in our contact form
Dear Mr/Ms
I am interesting to by or to construckt your mobille charcoal retort in my Farm in Greece.
Send me an email admin@vuthisa.com
I am interested in your products.
I am interested. Need more information.
Send me an email admin@vuthisa.com
Dear BKI team,
My name is Thomas Kessler. I am developing a bamboo plantage in the South of France and I am interested in the mobile pyrolysis unit 1.
I would appreciate if we could arrange video conference to get more information.
With best wishes.
Thomas
Hi Thomas I’ve sent you an email