…with a Portable Charcoal Kiln.

By Vuthisa
Herewith a step-by-step guide to making charcoal from yard waste in your own backyard. This specific design has been used extensively since 1996 to clear Namibian encroachment bush. Having tested this system recently we see no reason why this technique cannot be applied to clear yard waste or any other biomass, including corn cobs. For more information on how this charcoal can sequester CO2 back into the soil instead of being vented into the atmosphere visit our Biochar page. What’s great about this design is that it can be used for making charcoal for extended periods, due to its durable design AND its portability – you simply have to roll the drum to where the brush pile is located. Even though this is a direct method of making charcoal, it does NOT require complicated opening and closing of air vents or chimneys, due to the vertical stack effect of the narrow drum. If you’re looking for a way to transform your yard waste into a fuel briquette (with or without charring), visit our Fuel briquettes page. **Update** We secured a contract to remove invasive alien tree species and return the area back to pristine grassland and to increase streamflows. See more on that here. Due to the steepness of the terrain we decided to construct the kiln in sections to be assembled on site, but more on that later. See this new video slideshow outlining the production process:
A single burn will produce between 120 kg to 160 kg (350 lb) of charcoal from 0.7 m3/1000 kg (25 ft3/2200 lb) of medium-sized hardwood, but yields are dependent on many variables, such as your geographic location, moisture content-; type-; size of material and the experience of the operator, to name a few. It is possible to char wet timber with this system, but we don’t advocate this due to the increased time it takes to vent the extra water vapor. Colder, wetter climates yield less charcoal. In the test described below we achieved a yield of 16% charcoal, a conversion ratio of approximately 6:1 (6 weeks air-dried). By fine tuning your burn method and identifying the visual clues more accurately, yields closer to 30% can easily be obtained. Instead of increasing your carbon footprint by transporting large amounts of timber to the kiln (as with large industrial kilns) the kiln is simply rolled (by one person) to the already prepared and air-dried brush-piles. What you will need:
- A kiln consisting of a cylindrical drum and lid
- 120 kg of river grade sand (optional)
- General purpose soft potters-clay
- Industrial purpose gloves
- Large polypropylene bags or paper charcoal bags
- Small ladder
- Wheelbarrow
- Water or Fire extinguisher
- Shovel (optional) and Spade
- A few bricks
- Garden fork
- Tinder and matches
- Axe and/or bow saw and/or chainsaw
- A stockpile of yard waste, preferably within wheelbarrow distance of burn site
- A Sieve constructed from 15 mm chicken wire or expanded metal sheets
- Black plastic sheeting to prevent bags from getting wet
- If you are on a small holding or farm you will need a truck and or trailer to transport polypropylene bags to the packaging area
- In some cases it may be necessary to hire/purchase an Army type tent and small generator (for stitching machine) if you don’t have a shed
- A stitching machine and extra cones (thread)
Kiln construction
You need to construct this kiln with the help of your local light engineering works. Expect to pay around $600 USD which includes the cost of labor, so get more than one quotation. It can be a D.I.Y. job if you have good welding and bending skills. Otherwise consider having the kiln built in three sections, which is simply bolted together, no welding required and it is easier to transport. We have dubbed the new system the “Trans-Portable Kiln“. The plans for both types of kilns are contained in our Trans-Portable Kiln Construction Plans and User Manual.
Click here to download the plans. Also included in the manual is the specification sheet of a wooden Sieve Chute to screen your own charcoal. Join our participatory discussion group called the Portable Kiln Google Group. Joining it is optional, and is exclusive to Portable Kiln Owners for sharing and discussing their experiences OR enter our DESIGN CHALLENGE to design a biochar producing kiln that emits less greenhouse gases. Just print out the plans and hand it over to your local engineering works.

We have also launched a new manual. This manual describes how to build our new Biochar kiln called the ‘3-drum Biochar Retort‘. The 3-drum Biochar Retort is more clean burning (with the added lid and chimney) and the burn is more controlled, and the user has an option to create either Biochar or conventional charcoal. Click here to view the development of this kiln and how the Design Challenge helped to draw in biochar experts around the world.

We are bound by a license agreement for use of the kiln in Southern Africa, so if you are from the southern part of Africa and wish to use the Portable Kiln commercially you’re required to pay a license fee. For more information on licensing fees, made-to-order options or simply wanting to do backyard trials without paying the license fee, kindly visit our Order page.
The plans will outline the exact dimensions- and type of materials to use as well as the guidelines set out below. The kiln basically consists of a:
a) Lid. The lid sits loosely on top of a cylindrical drum. **Update** We have developed several new lids to suit different applications.
b) Open ended cylindrical drum/barrel. A length of mild steel sheet, rolled into a drum shape and welded on the seam. Please note: an ordinary 200 litre (55 gal) oil drum will not work – or last! This drum has a 1400 litre (370 gal) capacity and weighs 37kg (81 lb).
Some garden waste!
The thickness of the branches or stems that you use need to be more than 30 mm (1-1/4 inch), but preferably not more than 120 mm (7-3/4 inch). The larger pieces tend to not pyrolyze completely in the center.

Organize the waste into a separate pile. The volume of waste is not important, although you have to try and fill the drum up with as much yard waste as possible, but typically one should have more than 1 m3 (35 ft3) of waste ready. The kiln can accept 0.7 m3 (25 ft3) of carbonous brush. The branches and stems must be cut in lengths not exceeding 1 m (3.2 ft) long with the use of an axe, bow-saw or chainsaw.
Site preparation
Before anything else, carefully decide on the location of the kiln. Make sure there are no overhead hanging branches or power- or telephone wires nearby. Have running water (preferably a hose pipe) available or if it’s in a remote area, bring a fire extinguisher along, in case of unforeseen emergencies. The kiln is portable in the sense that it can be rolled into position. Care has to be taken not to position the kiln near the brush pile. Choose a level site and clear an area of approximately 3 x 3 metres (10 x 10 ft) of any flammable material.
If you don’t intend moving the kiln to other brush piles we recommend pouring river grade sand evenly over the site, but make sure it is at least 10 cm (4 inches) thick. The sand insulates the ground, but also allows one to dig vent holes underneath the kiln. If you find you don’t have sand or enough volume of sand, you can place 3 wooden pegs underneath the kiln, each approximately 100 mm (4 inches) in thickness, evenly spaced, to keep the kiln slightly elevated. This will allow for enough ventilation or allow one to create the holes in the sand more easily.
Making charcoal
(Also see alternative method posted as a blog comment)
- Burn “out of the fire season” and if you feel it necessary alert the neighbors if they are the jittery type – it is just common courtesy to respect other people’s rights.
- Pick a clear morning or a quiet windless afternoon. This is very important because in the first hour you are venting copious amounts of smoke and the neighbors will learn to hate you all over again! Theoretically, strong winds can also cause tiny pieces of burning material/embers to start spot fires far away from the kiln. I don’t believe this to be a serious possibility, but it’s always better to be on the safe side.
- The burn site must be cleared of dry grass and any other flammable material. A normal fire must be lit.
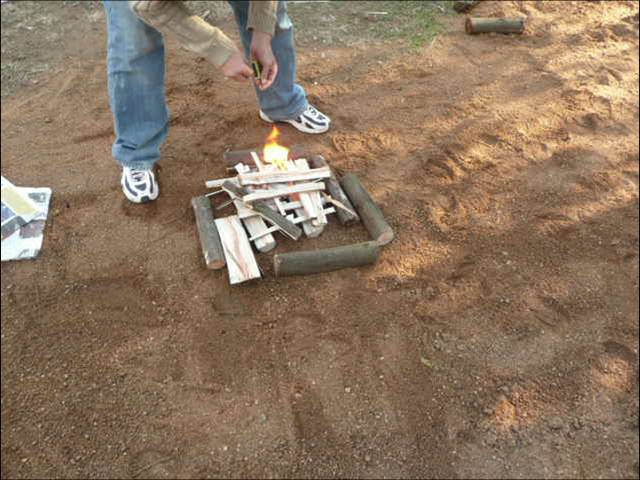
- The kiln is then rolled into position over the fire. If you’re using pegs – insert them now. Make sure the drum is completely round, not oval, as the lid will not be able to close up the opening at the top. Four air vents are then dug under the bottom of the kiln with the use of a spade.

- The air holes will provide much-needed draft through the kiln. Make sure holes are dug at least 30 cm (1 ft) across, even up to 50 cm (1.6 ft) to allow as much air in as possible. The kiln is then fed with material until the burning slash-pile reaches the top. The general rule is to keep adding timber until it no longer sags below the rim of the kiln. Be careful not to have pieces hang over the edge.


- Soon, all the wood/brushwood in the kiln will be ablaze and the smoke issuance will cease almost immediately. The temperature in the kiln will consolidate (and sometimes fluctuate) at between 380 to 400°C (716 to 752°F) anything from 1 hour to 1.5 hours after the last piece of timber has been loaded.

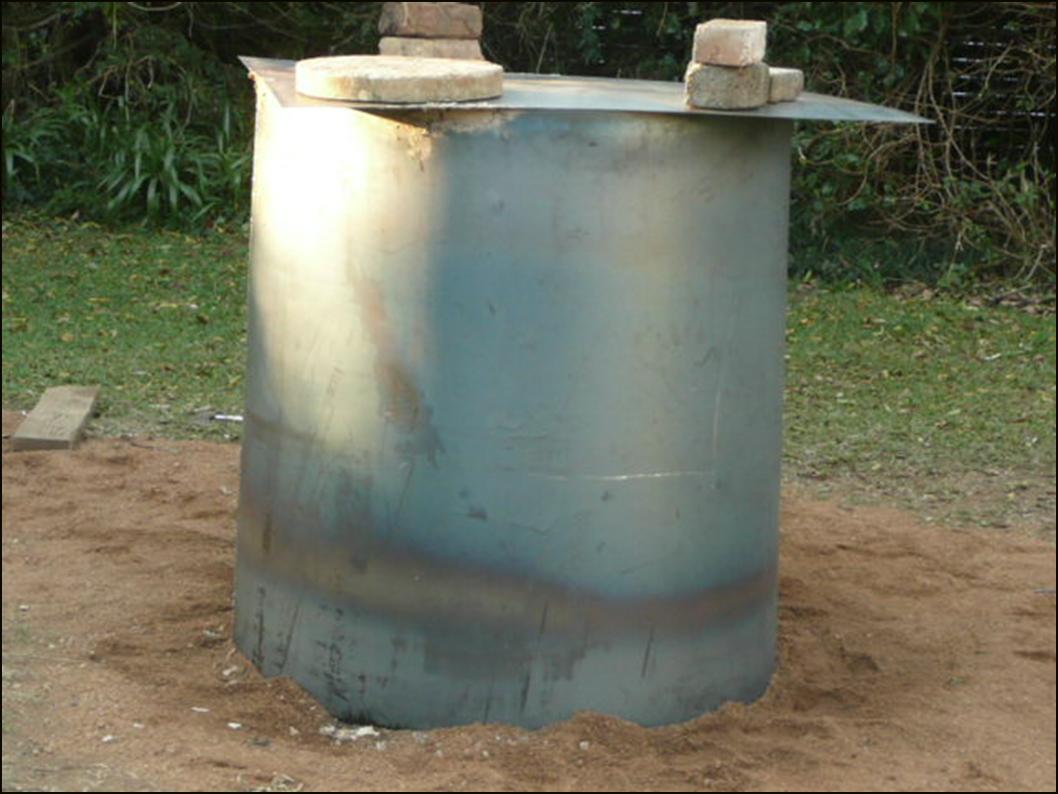
- Once white ash is seen spilling out of the vent holes (four openings under kiln), they must be sealed, by simply kicking them closed with the surrounding sand or by removing the wooden pegs. Blue/grey smoke will start appearing which means that the alcohols and phenols are burning off. This phase is closely followed by the tar producing phase whereby yellow flames are now visible. We advise that the lid be closed before the end of this phase as the tar given off assists in sealing off the lid against the drum. This phase can last for up to 30 minutes. Waiting too long before closing the lid can reduce the smaller sized wood to ash and closing the lid too quickly, won’t allow larger pieces of wood to pyrolyze completely on the inside. One is usually left with a small proportion of semi-charred pieces, but these can simply be added to the next load waiting to be turned to charcoal. Seal off the remaining openings with clay or strategically placed bricks, where one can see smoke spilling out.


- Care must be taken against accidental skin burns when applying the clay, as temperatures inside the kiln can exceed 500°C (935°F). Absolutely ALL the air supply to the kiln must be choked off, otherwise you’ll end up with too much ash.


- No further oxygen is therefore allowed into the kilns and the cooling down period commences. Under these conditions hydro-carbons are absorbed by the charcoal. In larger horizontal type kilns, temperatures remain hot for almost 72 hours and larger pieces of timber (usually the trunks) are able to sufficiently “cook” during this period. The same cannot be said for large pieces of wood contained in our kiln. On the positive side that is why this kiln works so well with small sticks and twigs. The kiln must only be opened once the metal sides are cool to the touch, usually the next morning (24 hours later).
- Charcoal is then sieved and smaller pieces are separated from the larger pieces by use of a wire mesh screen or simple garden fork and placed into polypropylene bags. In this exercise we produced 16 kg (35 lb) of charcoal which amounts to a conversion factor of 5.5 : 1. Take care to store the charcoal in a dry environment as moisture can lower the calorific content (heating value) of charcoal. The average heating value of charcoal is around 29 MJ/kg, almost twice that of wood. We used logs with an average diameter of approximately 100 to 120 mm (4 to 4-3/4 inch) and as a result produced very little fines and ash.


The process – explained
Now that we know how to make charcoal, what thermodynamic reactions are actually taking place during the different stages of charcoal making? Knowing this might help you to gauge your own operation and fine tune it. It is a good idea to invest in an industrial purpose, digital thermometer and Type K thermocouple rod ±0.5 metres (1.6 ft) long. This will cost approximately $200 (USD).
The pyrolysis of wood in such apparatus basically resolves itself into 3 different stages:
- Evaporation of the moisture present in the wood takes place as the initial phase, up to an average temperature of 170 °C (338°F). During this period scarcely any gas is produced.
- As the fire builds up inside the kiln, the temperature rises and at approximately 280 °C (536°F) the exothermic reaction begins to take place. Gas consisting almost entirely of carbon monoxide and dioxide is evolved and a certain amount of acetic acid is formed together with small quantities of wood-naphtha and tar.
- The exothermic reaction then continues during which concentration of carbon in the charcoal takes place. Large quantities of hydro-carbons, acetic acid and wood-naphtha and tar are produced while the temperatures rise to 380 to 400 °C (716 to 752°F).
What is charcoal generally used for? The main use of charcoal in the households of the developing world is to heat water either to cook food or provide hot water for washing, but elsewhere charcoal also has many applications. You could use the resultant charcoal and turn it into Biochar (also known as Terra Petra) as a soil amendment. Charcoal can enhance plant growth, reduce fertilizer requirements, reduce the soil’s acidity and offer a host of other benefits as can be seen in this post: http://vuthisa.com/2011/01/09/biochar-as-a-soil-amendment-and-carbon-sequestering-tool – OR – combine the char with a non-woody biomass fuel-briquette – OR – A good way to celebrate the fruits of your labor would be to test some charcoal in a barbecue, and since you reduced your carbon footprint by not buying commercially manufactured charcoal and converted waste biomass that would otherwise have decomposed at the landfill site, which would contribute to global warming – its eco-friendly too :-).


One thought on “Make charcoal in your own backyard”